Download
Before Installation
EPTA needs Conda and Bioconda channel to complete the installation.
Download Conda:
Mniconda Download (Recommended)
Add Bioconda Channel:
conda config --add channels defaults
conda config --add channels bioconda
conda config --add channels conda-forge
Install EPTA
Standalone Version (Linux):
conda create -n epta python=3.8
conda activate epta
conda config --set channel_priority flexible
conda install -c phillip404 epta -y
Lite version:
Linux & MacOS
conda create -n epta-lite python=3.8
conda activate epta-lite
conda config --set channel_priority flexible
conda install -c phillip404 epta-lite -y
Windows (>=Windows 10)
conda create -n epta-lite python==3.8
conda activate epta-lite
conda config --set channel_priority flexible
conda install -c phillip404 epta-lite --only-deps -y
pip install https://github.com/Phillip404/easy_protein_tree_annotating/raw/main/Packaging/Windows/epta-lite-1.0.tar.gz
Standalone Version For Windows 10 or Higher:
Windows 10 and higher supports Linux subsystem, thus a standalone version could be run under such a subsystem on Windows platform:
- Standalone version Installation:
Open Microsoft Store
Search Ubuntu
Install Unbuntu
Type bash in Windows search bar and open it
Follow the tutorial above to install the Standalone version.
- Run Standalone version:
Close all Linux subsystem instance
Download and install Xserver as graphic output connector from vcxsrv Download
Install Xserver in full mode
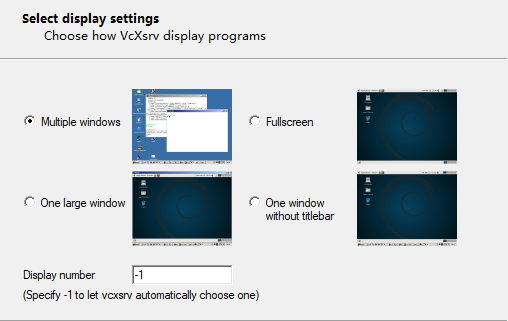
Open Xlaunch set it as following:
STEP 1:
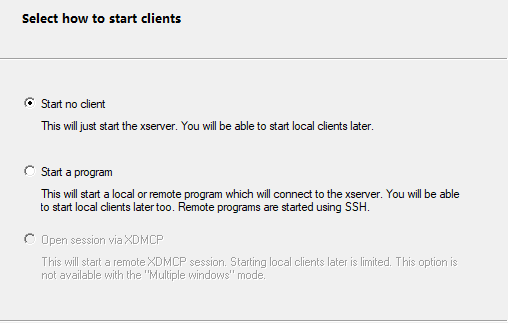
STEP 2:
STEP 3:
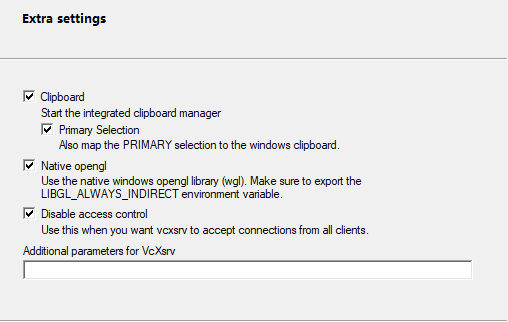
Note
It is crucial to pick the option Disable access control in this step.
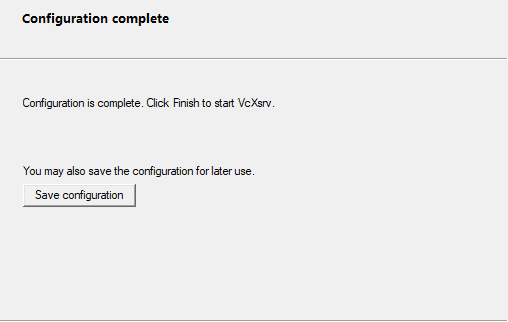
STEP 4:
Open bash window
Active EPTA environment and run EPTA